How SplitMate Works
Get started in a few simple steps, from capturing expenses to settling up with your group.
Create Expenses & View History
Start by adding expenses your way, then review past activity in one simple running feed.
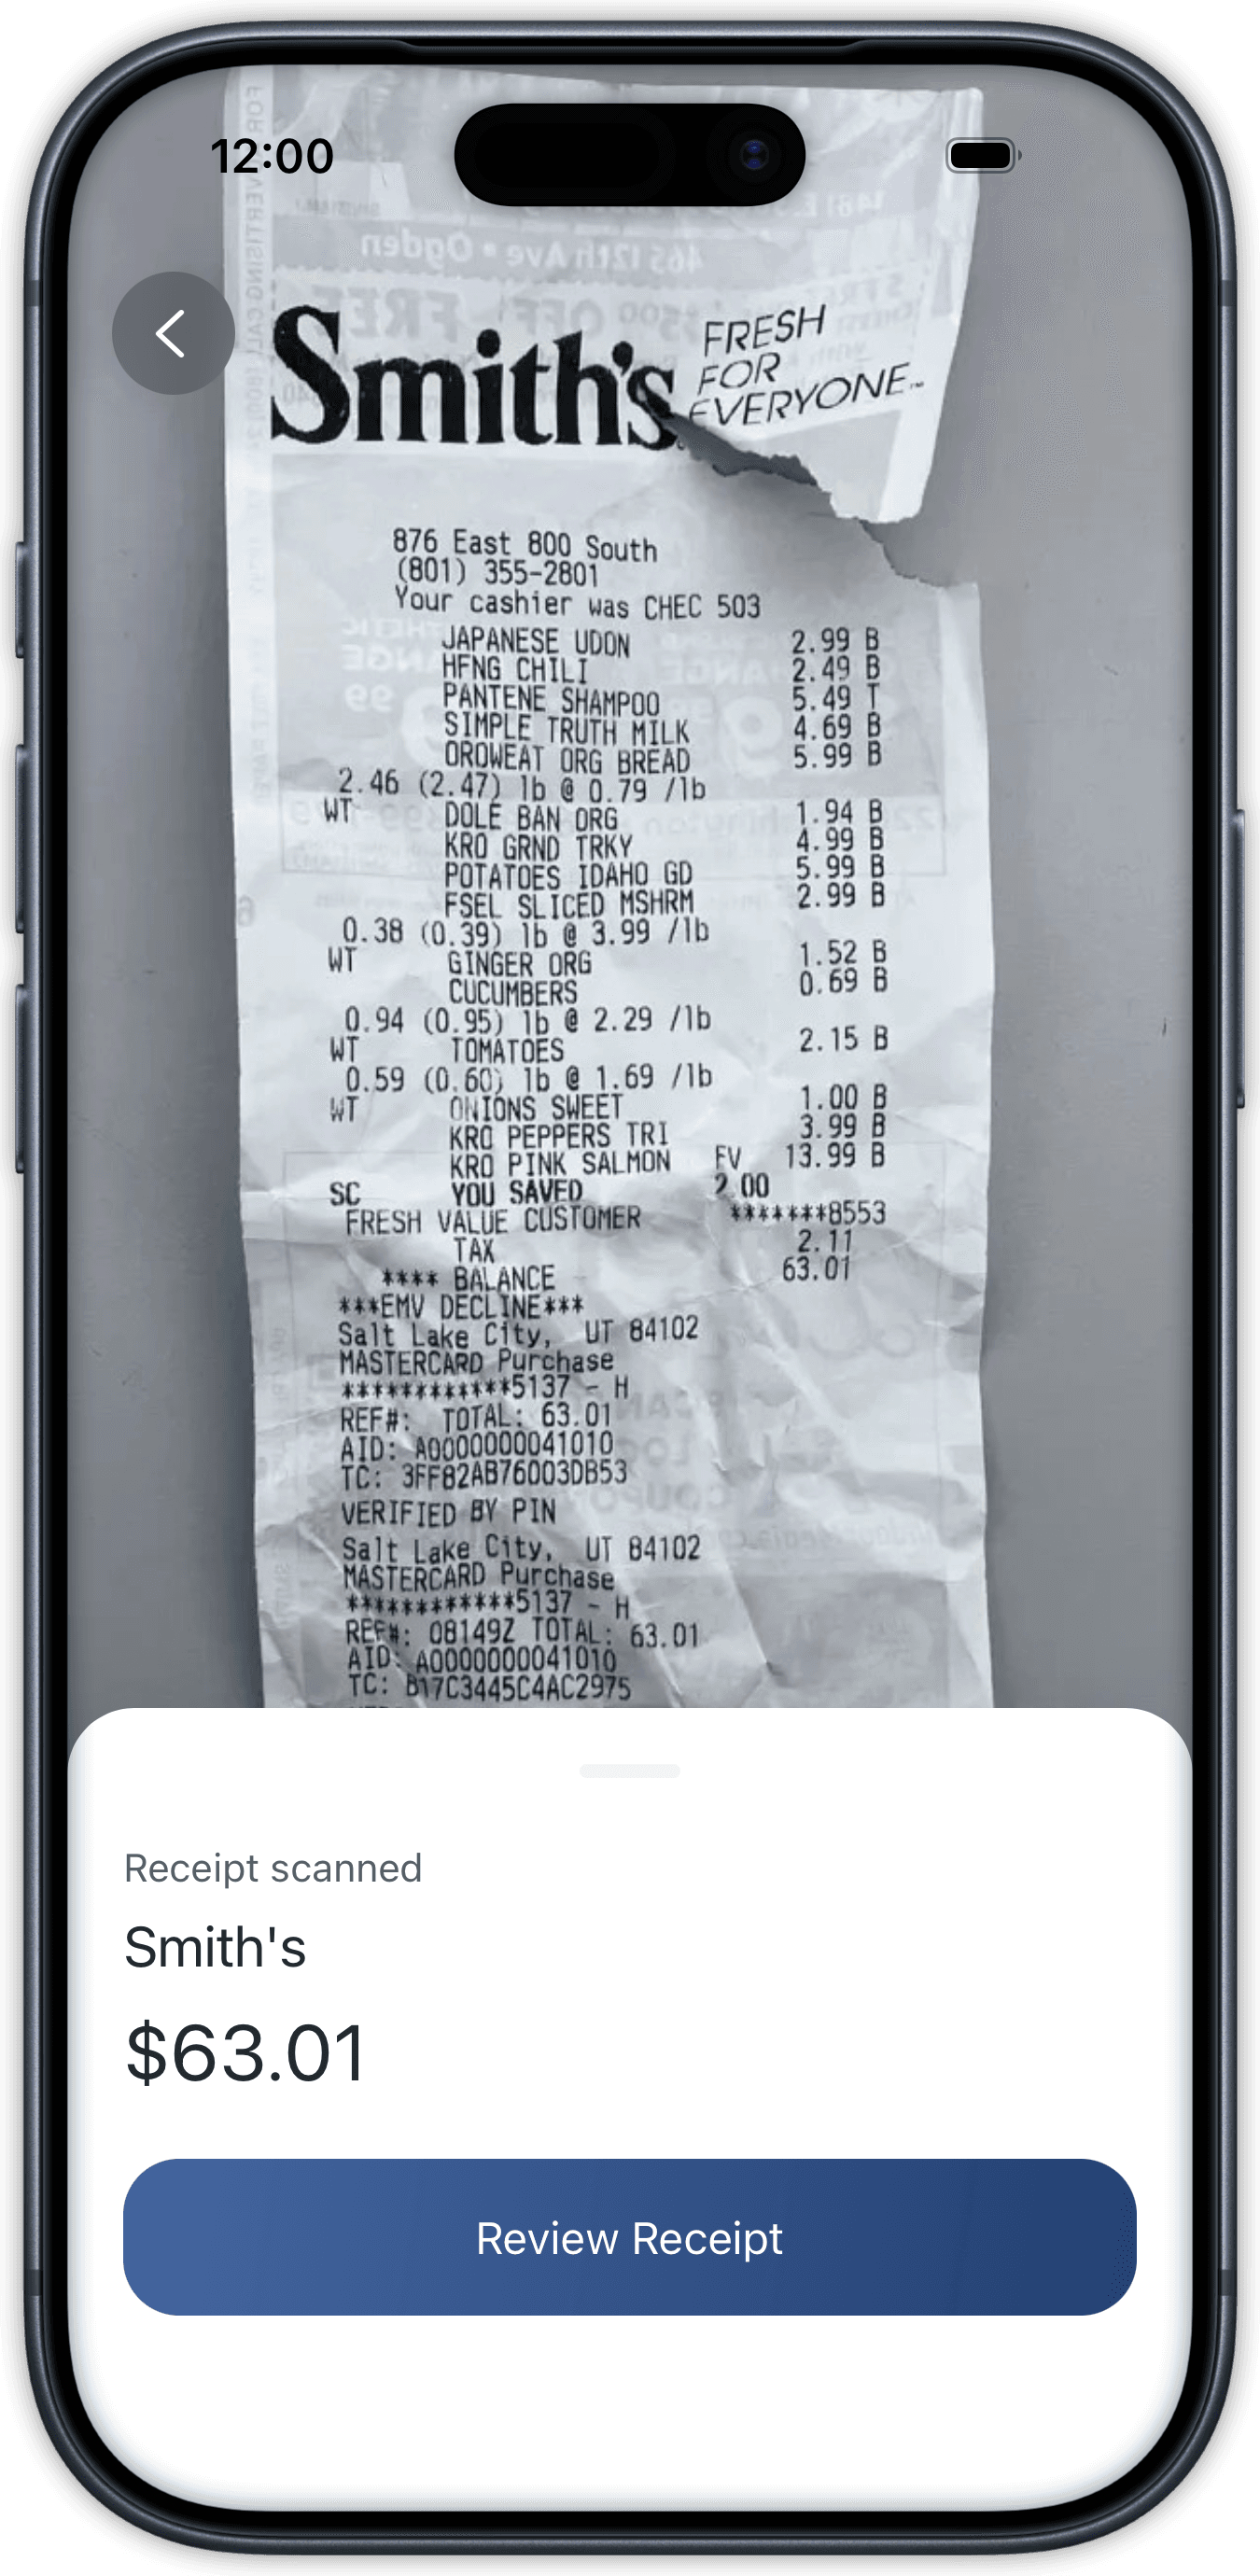

Scan a Receipt
Snap the receipt and SplitMate reads every line item. Review the parsed total before it lands in your group. No typing, no missed taxes.

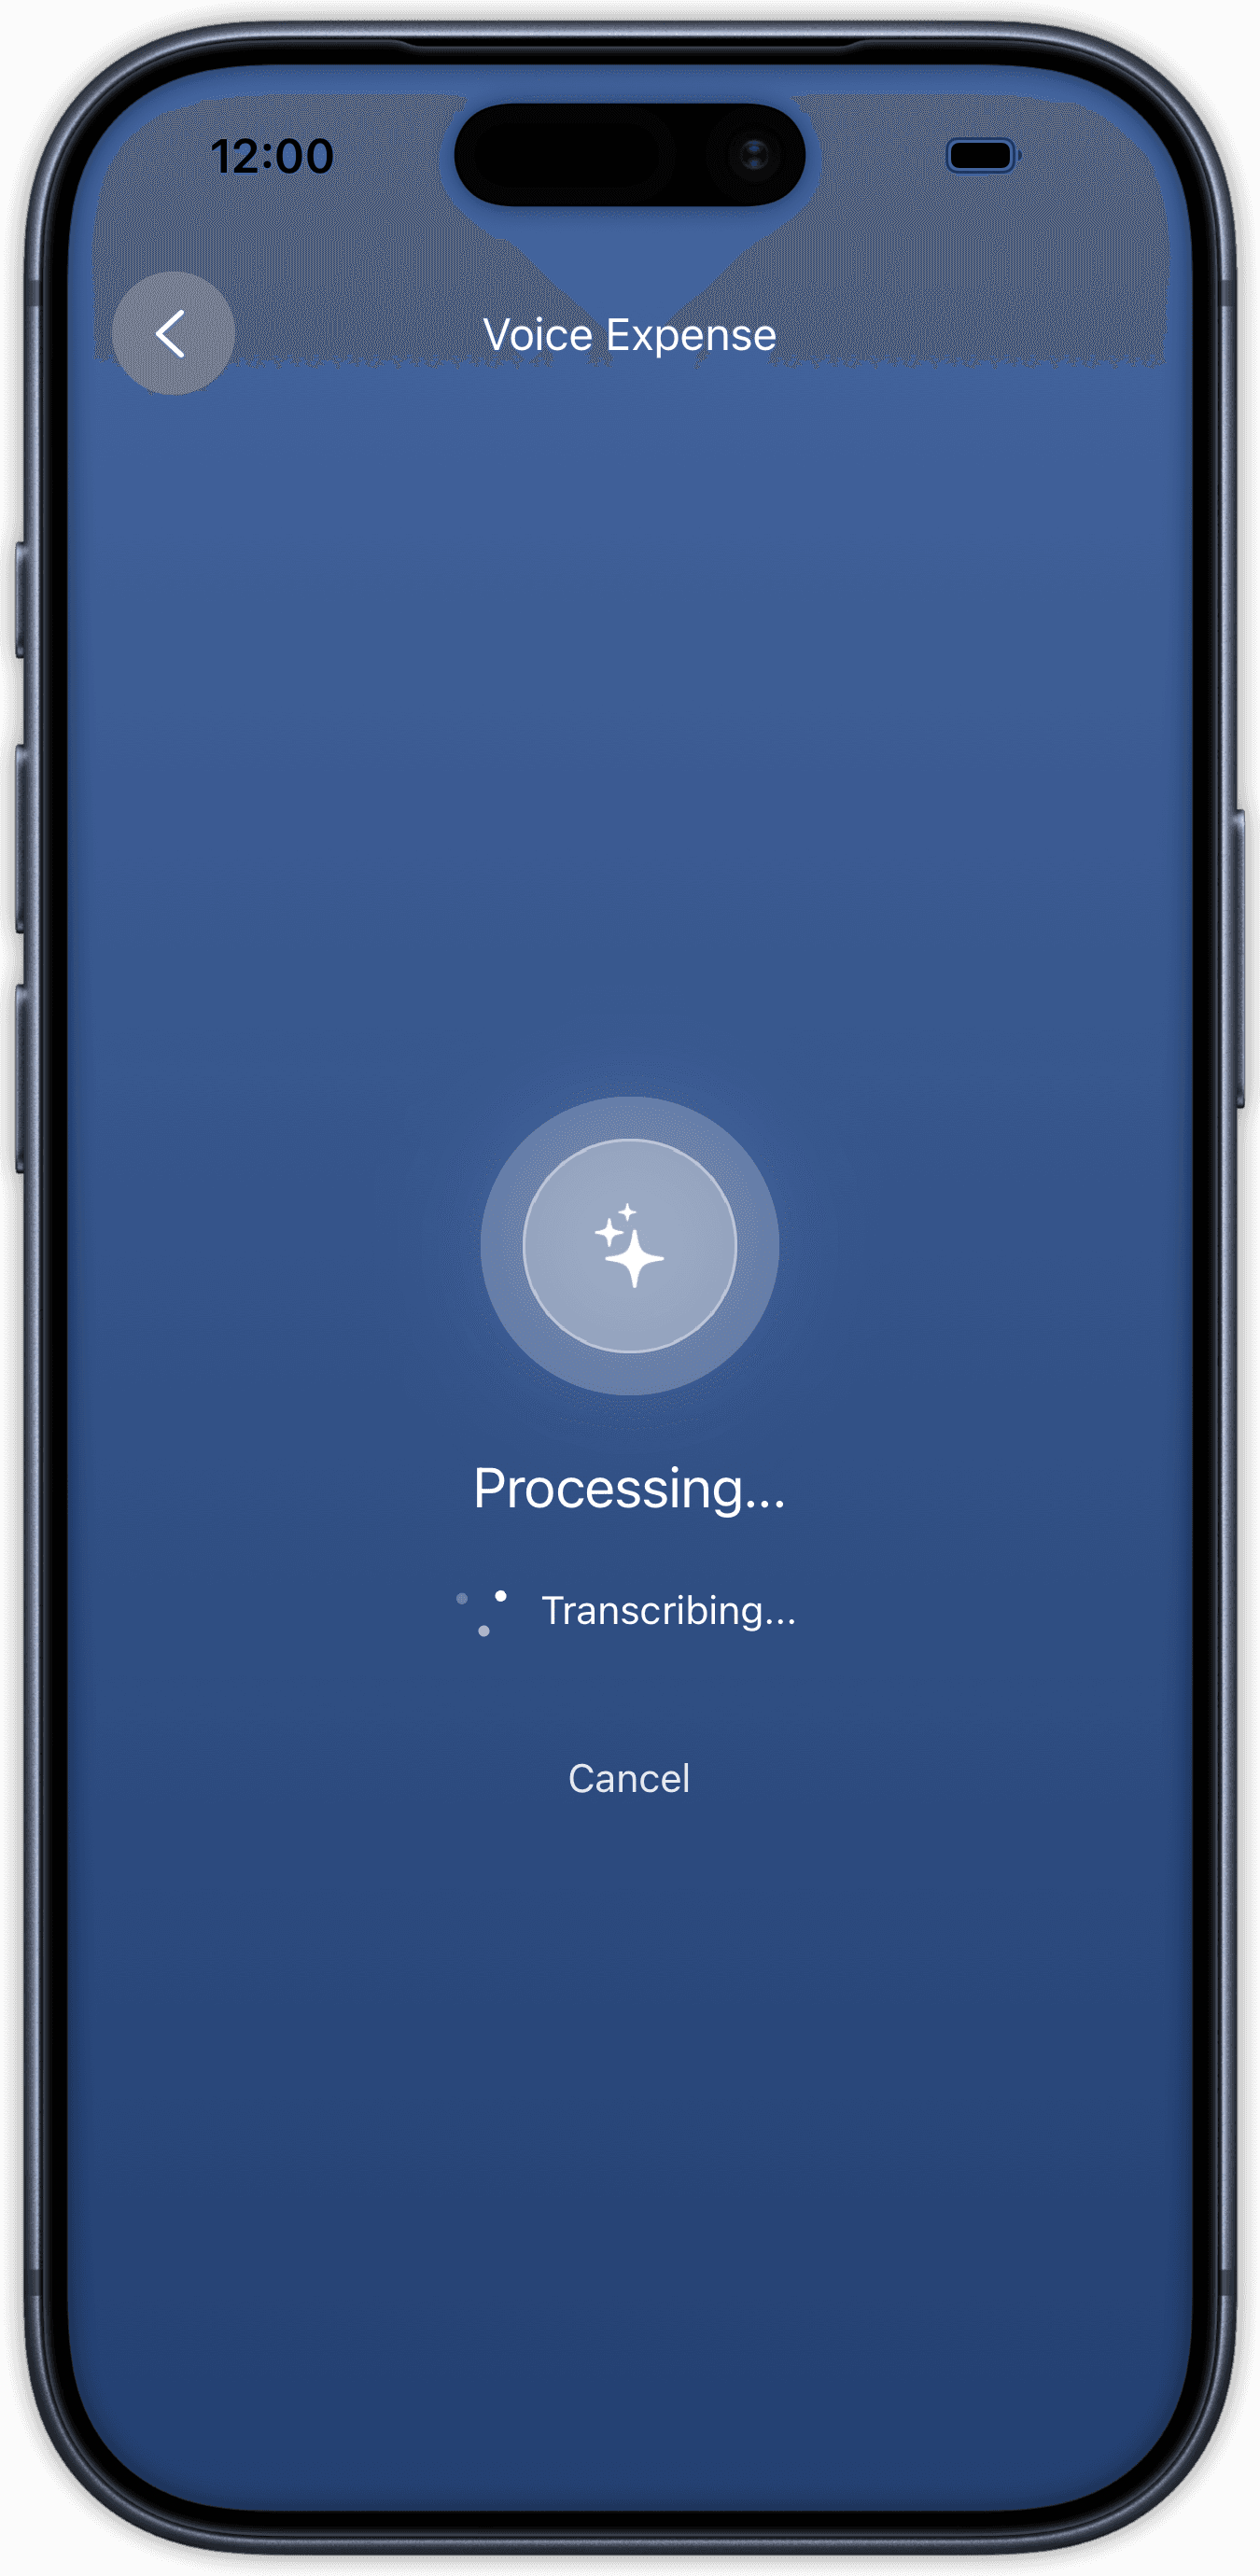
Or Do a Voice Expense
Prefer talking instead? Speak your expense out loud and SplitMate logs it for you with no typing required. Just confirm the details before it is added.
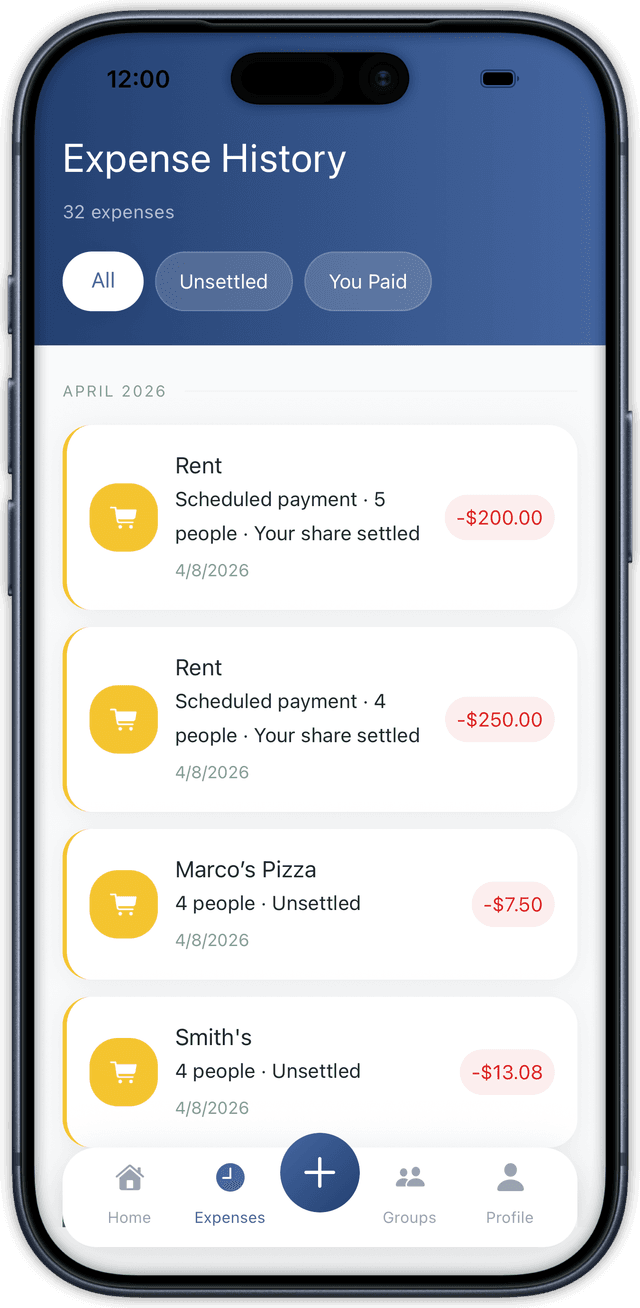
Activity at a Glance
All your expenses are organized in a simple, running list so you can quickly see who paid, how much, and when.
Create a Group & Group Functionality
Invite your group, manage shared expenses, and keep every split easy to follow.
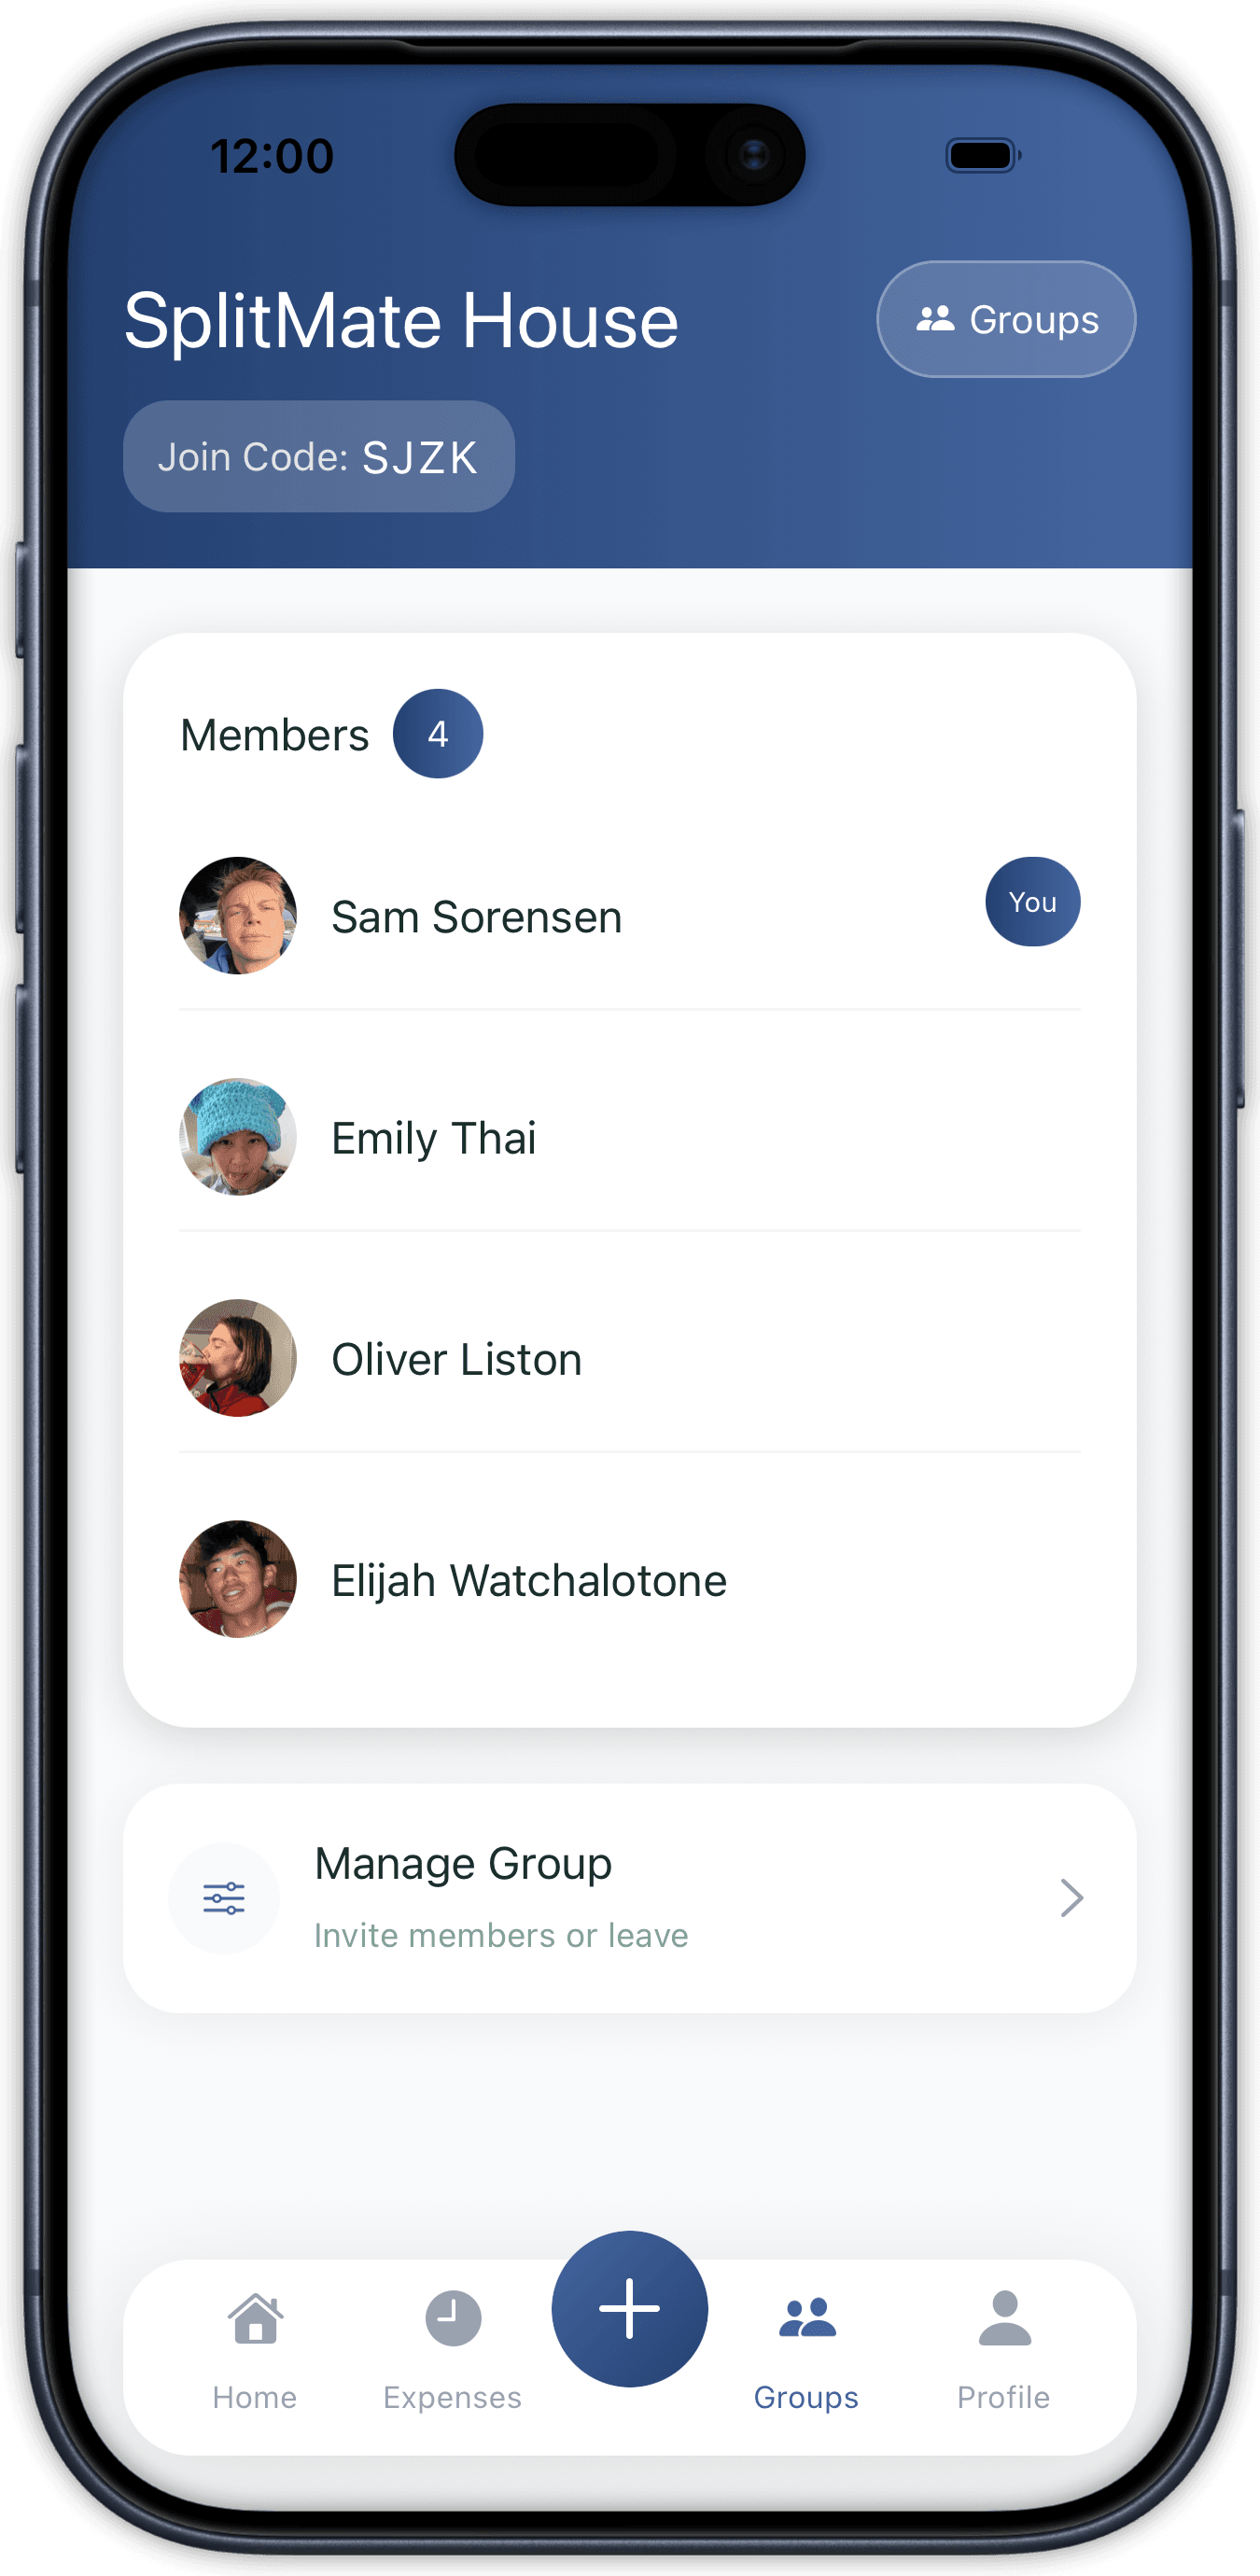
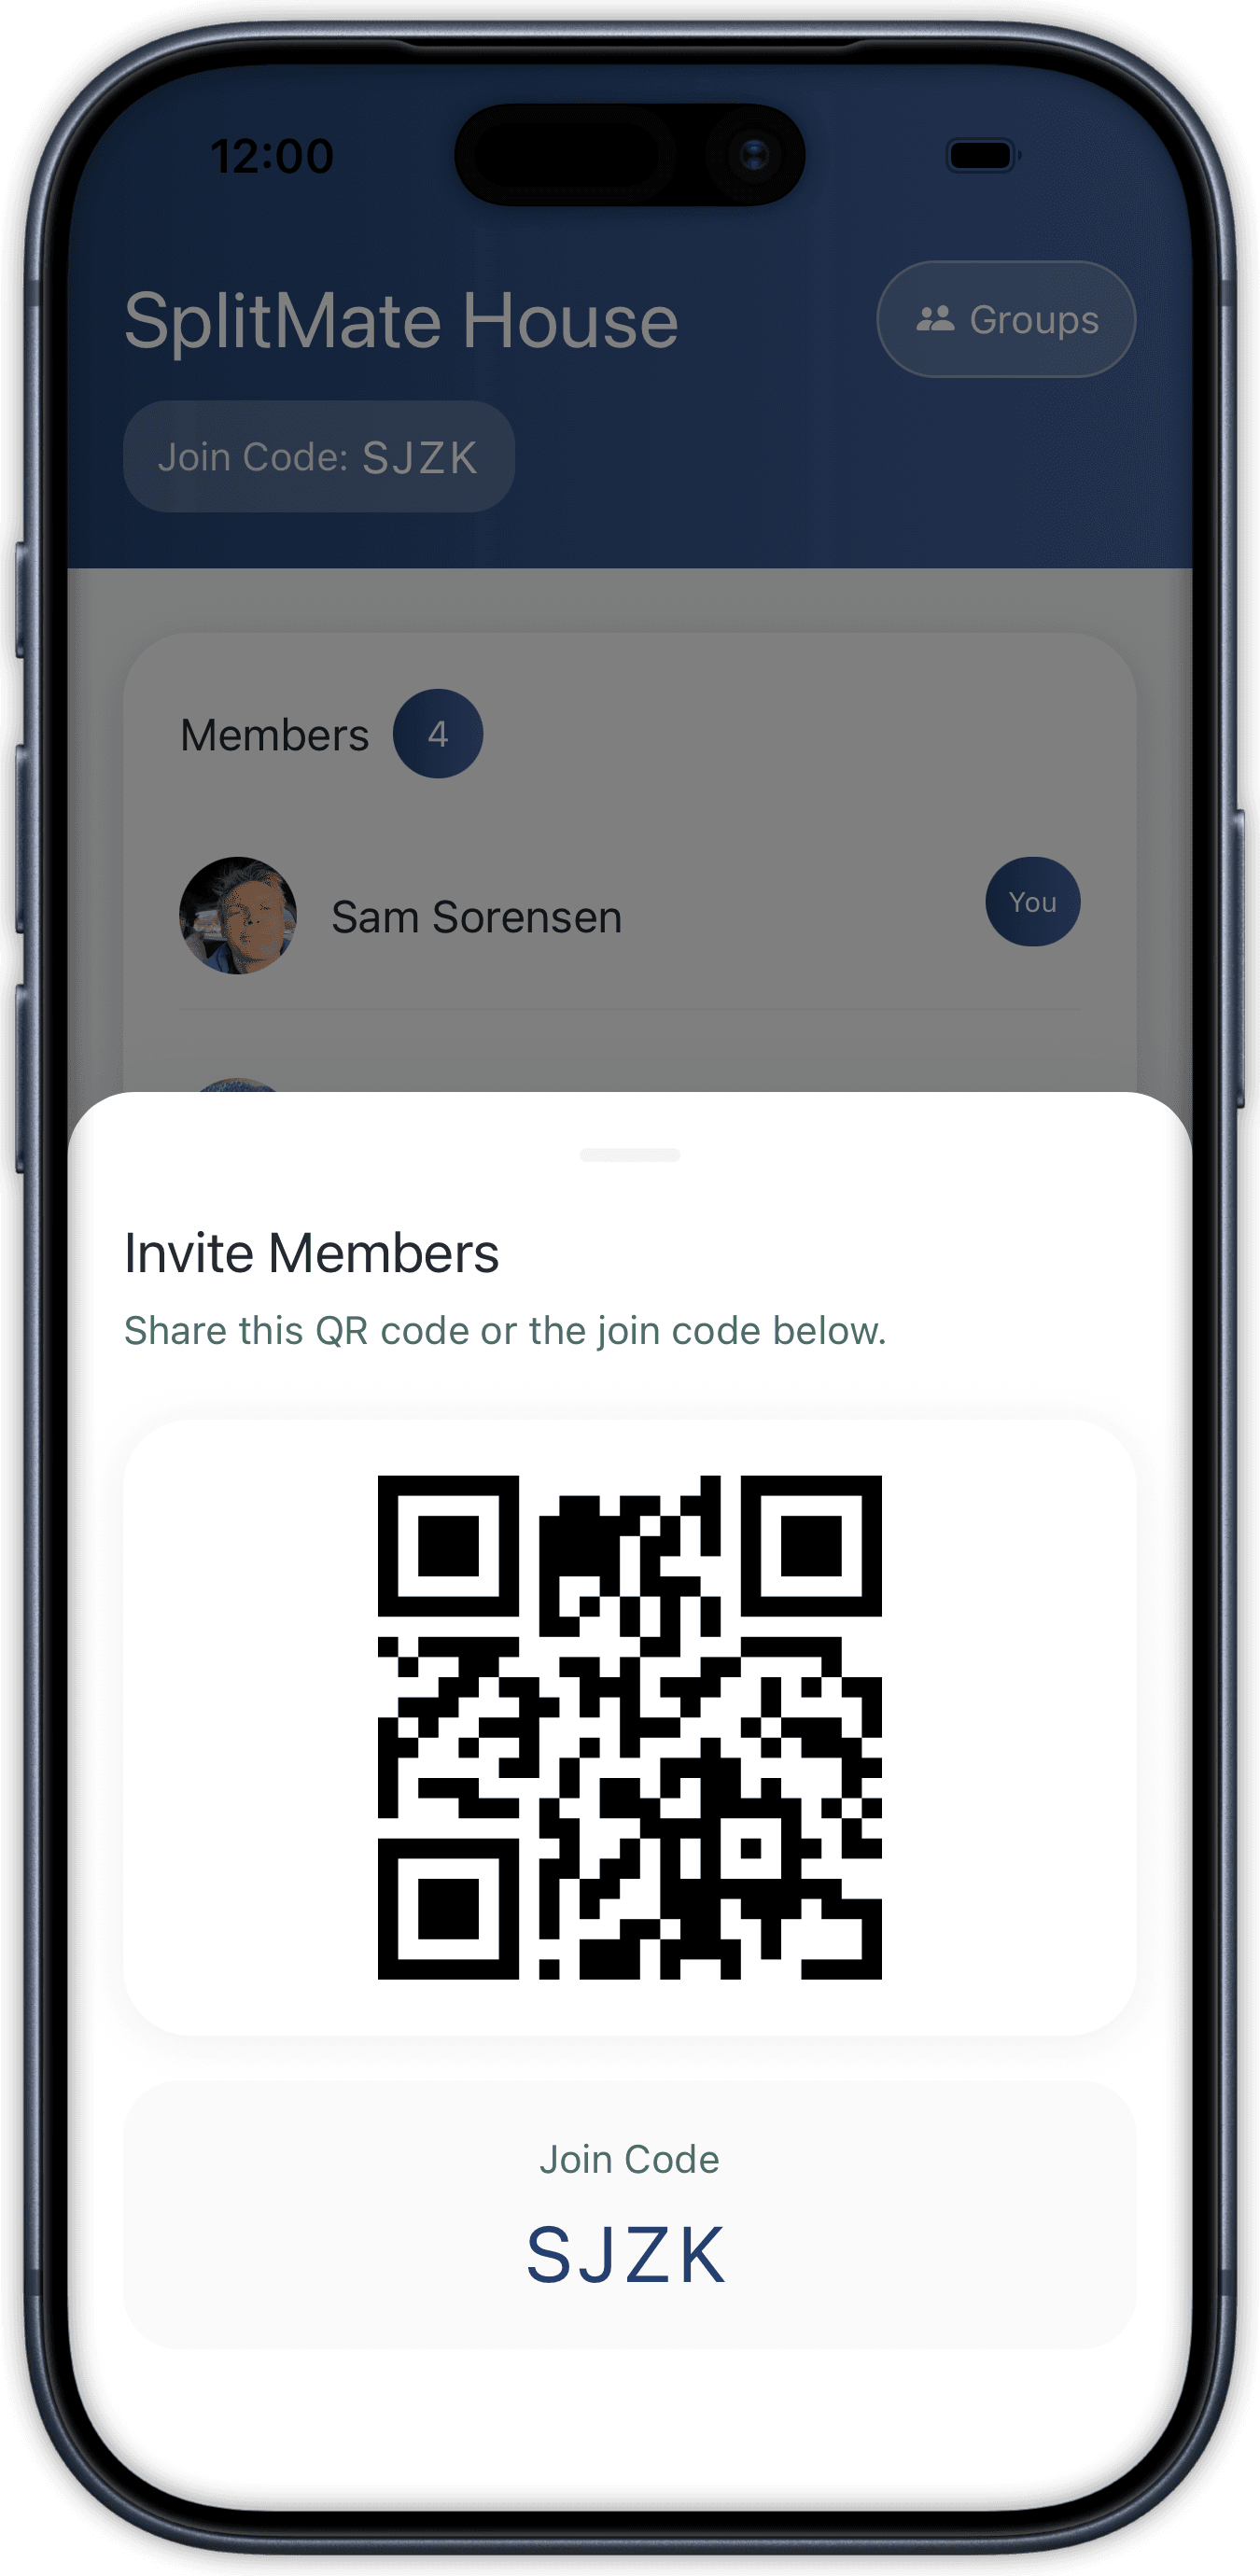
Create Your Group
Set up one group for the people you actually split with. Share a QR code and roommates are in without email invites or extra friction.
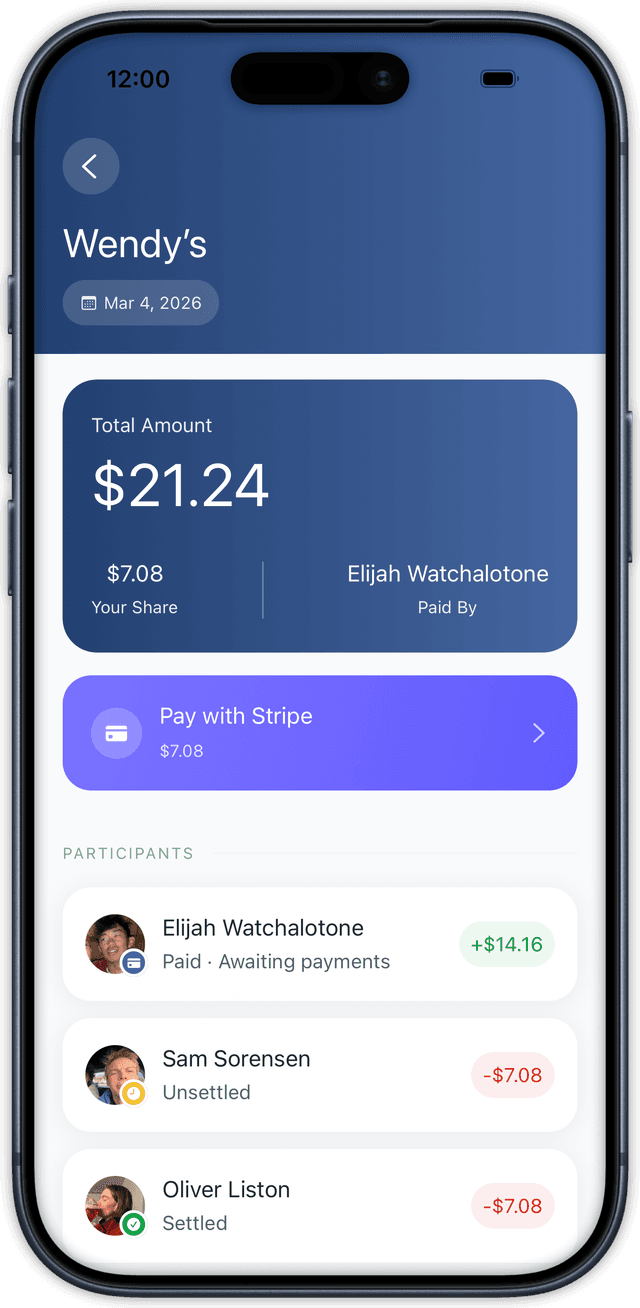
See Group Expense Details
Tap any expense to see the per-person math, who has paid, and what is still outstanding. Everyone stays on the same page.
Settle Up
When it is time to close the loop, payments and balances update right away.
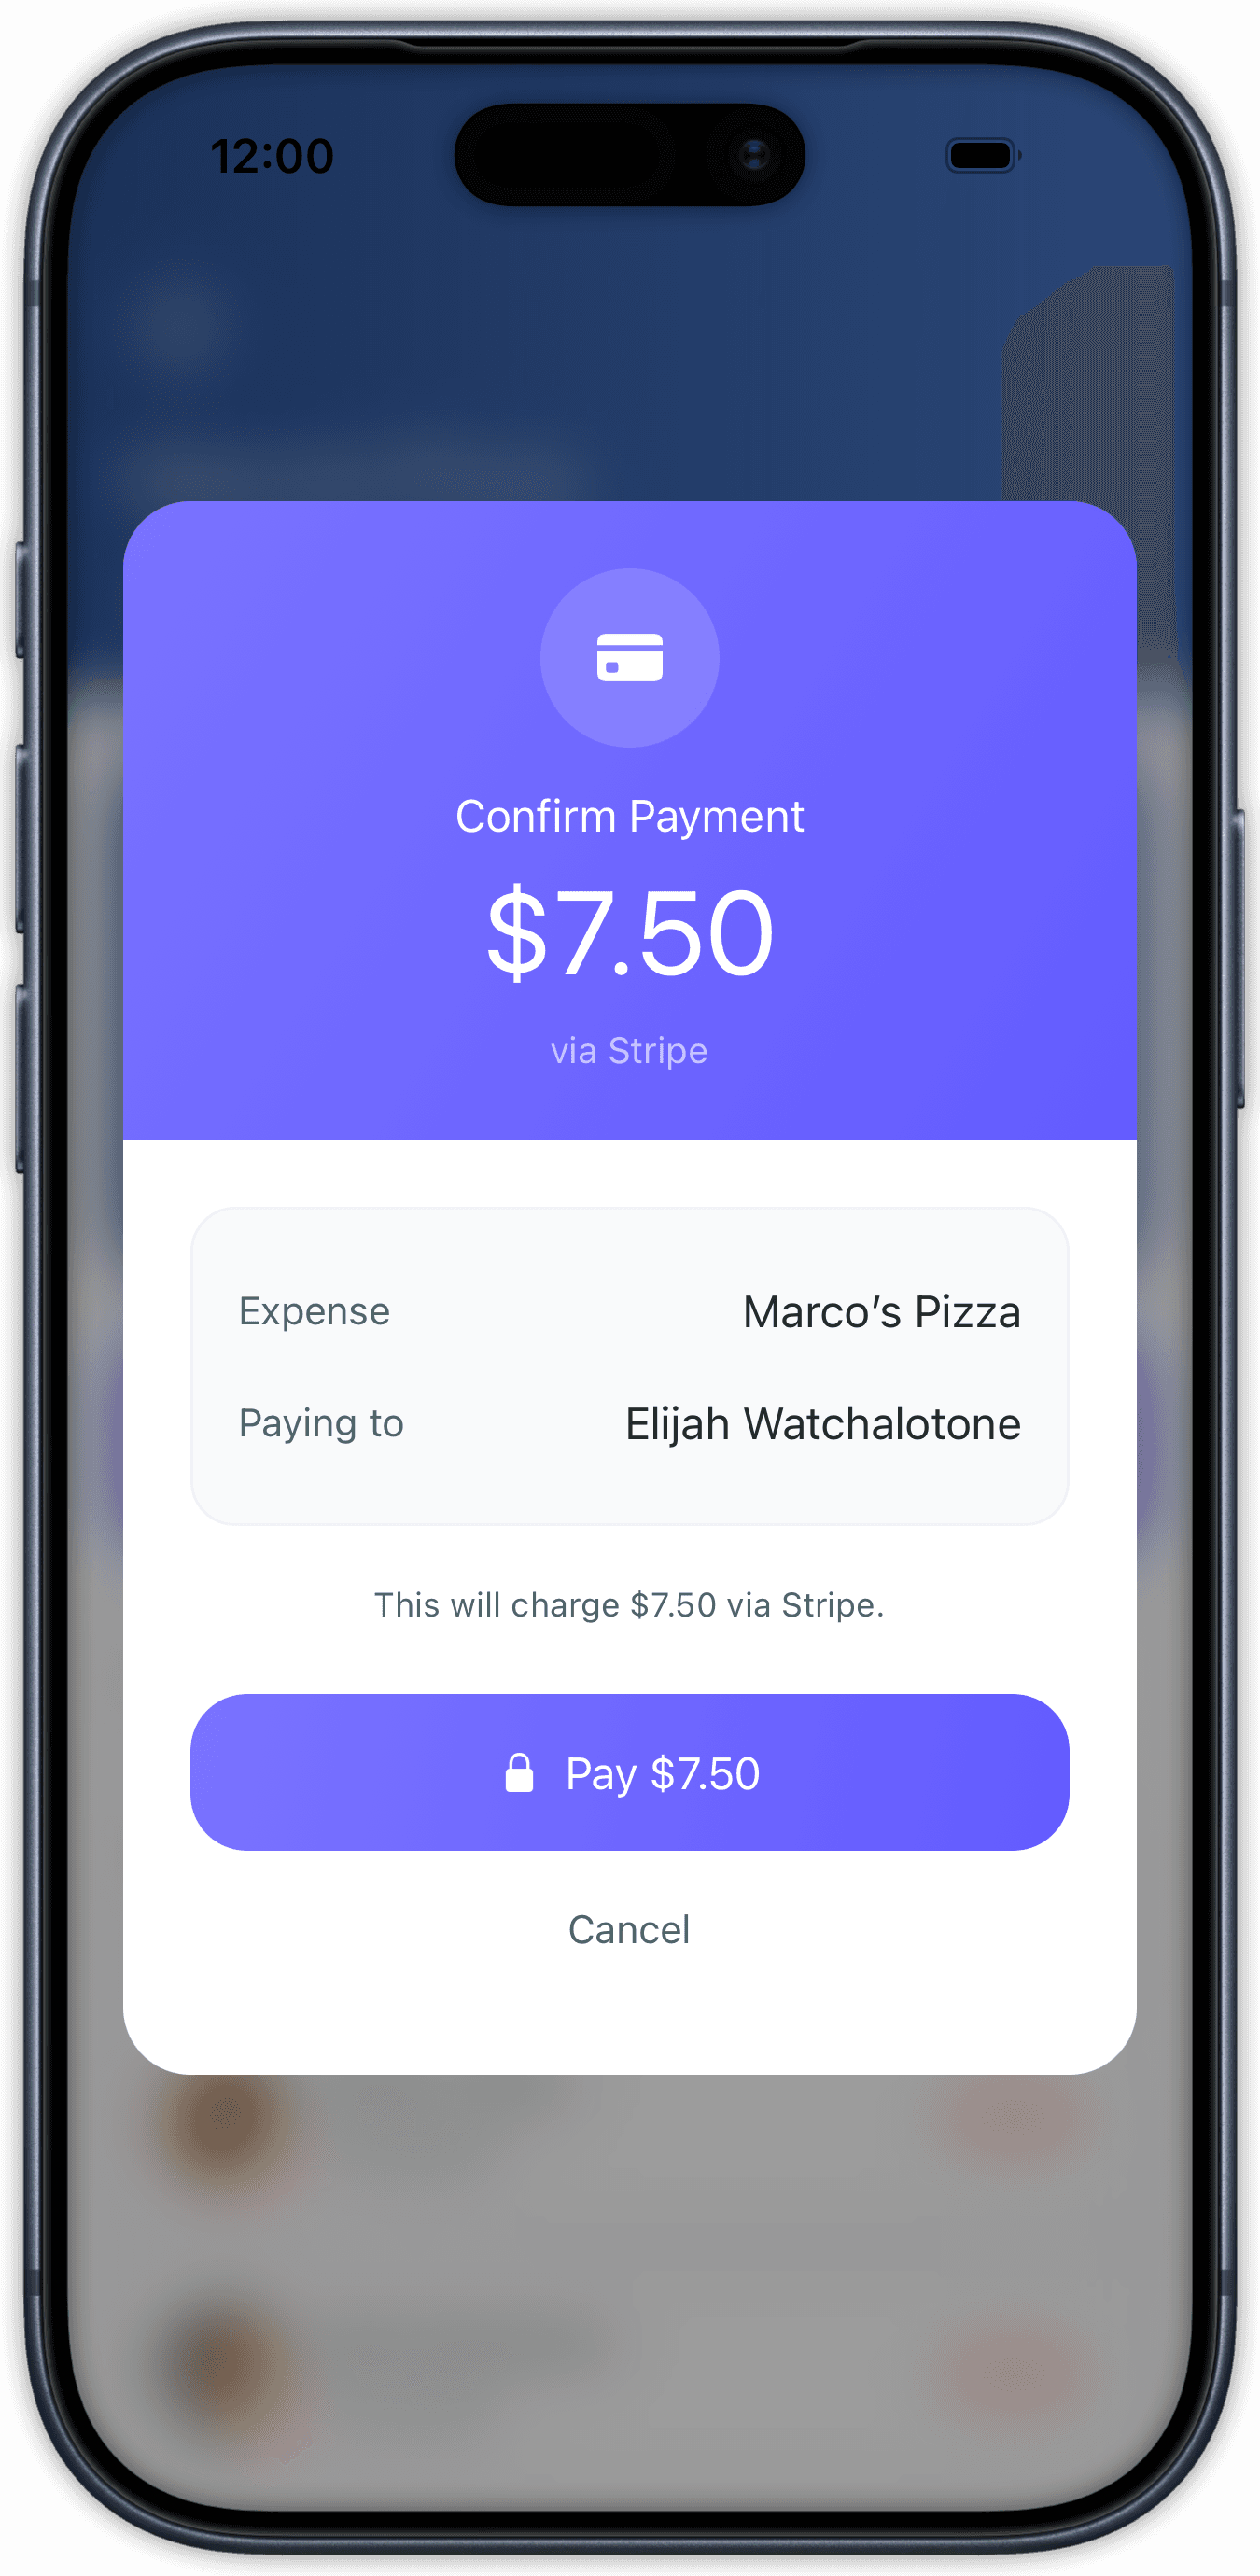

Pay Your Share
Pay your share through Stripe in two taps. Balances zero out the moment the payment confirms, with no chasing Venmo screenshots.